 Tired of exposing your valuable cargo to the elements? Our custom vinyl utility trailer tarps are ideal for protecting your precious cargo as well as your trailer itself. Our made-to-order tarps can be sized to your exact needs so before ordering we recommend that you read this page in its entirety so that you end up with a tarp that exactly fits your requirements. If you have not ordered a tarp before please follow this link to learn about sizing your tarp. You may also be interested in this podcast discussing utility trailer tarps.
Two common configurations for utility trailer tarps are:
Before deciding on the type of configuration you want, and the size of tarp you need, there are a number of things you should consider. Let's review some things that may influence your tarp order.
Carefully consider how far you want your tarp to come down on the sides of your trailer by reviewing the following points.
If there are fenders or other obstacles projecting out from the side of the trailer, you will generally want to avoid having the sides of the tarp come down beyond these obstacles. In some cases you may want us to add notches or cutouts to accommodate these obstacles (see below).
If your trailer already has fastener points on the sides, such as hooks or eyelets, the tarp should not extend beyond an inch or so above these fasteners, otherwise you won't be able to tighten down the tarp using these anchors. Ideally, you will want your fasteners to be at least 4" below the bottom of the tarp to provide some leverage when tensioning your tarp. If your trailer does not have anchor points yet, wait until you get your tarp before adding them. This will allow you to put the fasteners in the ideal location for your tarp. We can also adjust the location of the grommets to align with or straddle your anchors.
Consider what you will be hauling with your trailer. If your load is often taller than the bed of the trailer, you should have us make the sides a little higher to accommodate taller cargo. Keep in mind that if you adjust your sides to accommodate taller cargo, you will need to lower the fasteners in cases where the cargo does not extend above the sides of the trailer. You could also consider having two rows of anchors, a lower row to use when the trailer is empty and a higher row to use for tall cargo.
When ordering a waterproof cover you should decide how to prevent water from pooling in the top of the tarp. We recommend reading this article on tarp draining to get some ideas on this topic before placing your order.
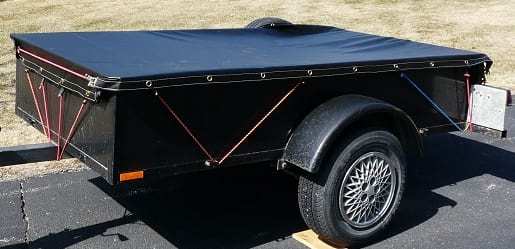
A wrapped tarp is simply a 2-dimensional (flat) tarp that you use to cover the top of your trailer with extra width and length to allow you to wrap part of the sides of the trailer as well. To size your tarp correctly you will need to decide how far you want the tarp to go down the sides and you have to add this distance to the tarp dimensions. Be sure to add twice the side distance to the length and width of your trailer to determine your tarp dimensions. For example, if your trailer is 4' x 7' and you want your tarp to go 1' down the sides you would order a tarp that is 6' x 9'. In this case, you would need to wrap the excess corner material when you tie down the tarp. If you zoom into the picture above you will see that this is not a fitted tarp because the corners had to be folded over. You can also tell because the front is lower than the sides.
To order a standard wrapped utility trailer cover with grommets and a reinforced hem you can use our simple custom tarp order form. If you need special fasteners, such as D-Rings, or you need precise grommet spacing, please use our custom tarp with d-rings form.
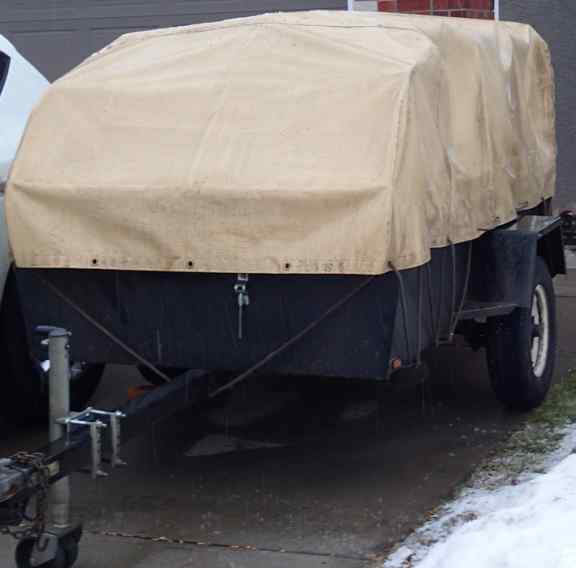 Fitted tarps are sized to exactly fit your trailer, kind of like top of a shoe box. With fitted tarps the excess material that normally "bunches" in the corners is removed and the corners are sewn to create a nice tight fit. To order a fitted tarp please use our fitted trailer tarp ordering function which allows you to enter 3-dimensions:
Always add an inch or so to your actual trailer width and length so that the tarp is sure to fit and to make it easier to put it on and take it off.
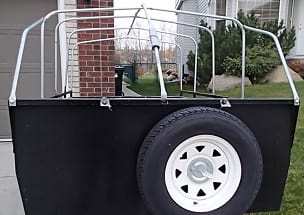 The tan colored tarp shown here is a special order tarp that was made to the customer's exact specification to fit this frame. Notice how the front of the tarp is tapered and the sides angle inward, this differs from our standard fitted tarps which are normally rectangular in shape. Be sure to provide a good drawing with lots of detailed measurements if you want a tarp with a special shape like this one. Note that, regardless of what style of tarp you get, if you have a trailer that is open on top you will need a strategy to prevent rain water from pooling on top of the trailer. Generally you will need either a rigid structure on top of the trailer or you need to somehow allow the rain to drain off the back or sides of the trailer.
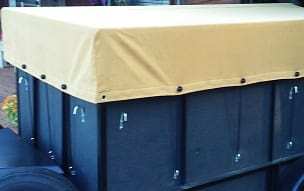 Here is another example of a fitted tarp made from heavy duty (cotton) canvas. Canvas is generally not an ideal material for trailer covers because it is not 100% waterproof and it is prone to shrinkage.
Rectangular fitted tarps generally cost about $75 more than wrapped tarps due to the extra sewing that is involved. The cost of contoured covers or other special shapes will vary based in the material required and extra time needed to form the shape.
In most cases, grommets can just be evenly spaced along the sides of the tarp but sometimes it is important for the grommets to align or straddle the trailer fasteners. If you require exact grommet positioning we can usually accommodate this provided you send us a diagram that shows the desired grommet locations. Generally, you would place a tape measure at one end of the tarp and supply us with the inch markers where you would like the centers of the grommets to be positioned. It is best to send us a diagram showing your grommet locations if you need these to be precise. Usually, spacing your grommets every couple of feet is sufficient.
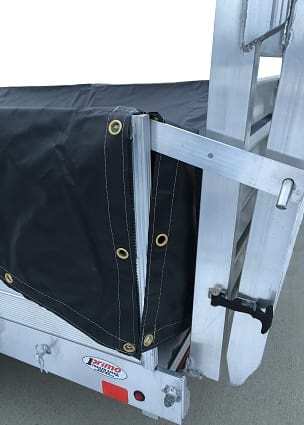 Some trailers have tailgates that are higher than the rest of the sides or other special obstacles that can't be easily covered with a standard fitted tarp. One solution to cover such a trailer is to have us cut flaps in the tarp to allow it to go around the tail gate or other obstruction.
Notice here that we have aligned the grommets on either side of the flap so that the corner can still be well secured. It is possible to add flaps to both the front and the back if required.
Here we see another example that shows a fitted tarp on the front with a flap in the back. In this case, part of the flap is taken up by taillight assembly. In this situation you can either just accept the fact that the tarp might not come down quite so far in the back or, if you wish, we can make the rear flap a little longer than the side flaps so that all of the sides come down the same distance.
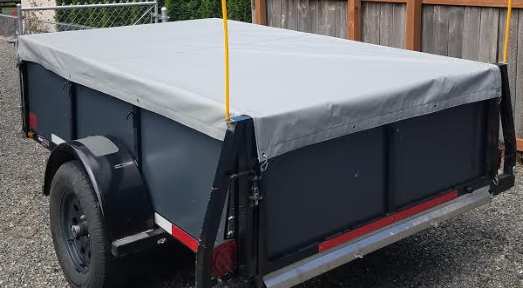
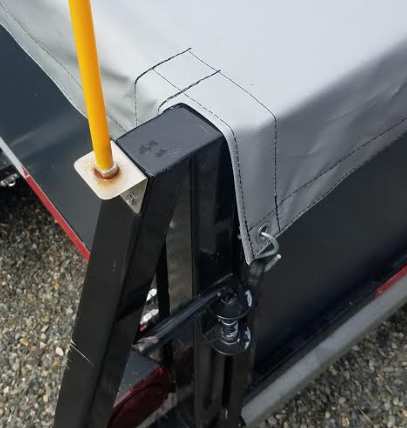
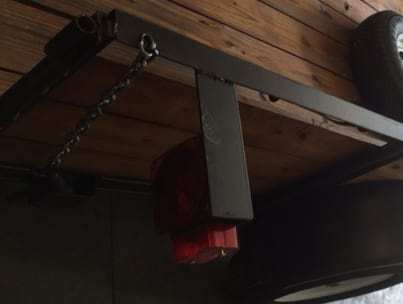 Tail lights and license plates are common obstructions that make it difficult to cover trailers using a flat or fitted tarp. Unlike the earlier example, where the taillight assembly was at the back of the trailer, here we see that it is a few inches from the back. What we can do in this case is to cut a slit out of the tarp to wrap around the taillights. These slits are always reinforced with seat belt material to prevent tearing.
Unlike typical polypropylene tarps, that tend to rip and fray during a long journey due to the wind force, our utility tarps will hold up for years. Even with our heavier material, we still recommend that the tarp be securely fastened since prolonged wind flapping will eventually weaken the vinyl.
In most jurisdictions, the law requires you to cover your trailer cargo. Why not buy a cover that can also be used to protect your trailer from the elements? Our waterproof vinyl tarps will keep your utility trailer nice and dry to prevent rotting and rusting and reduce the need for repainting or staining your trailer.
If you have a large utility trailer and you don't require your tarp to be waterproof, consider purchasing one of our heavy duty mesh roll tarps.


